
Fresh, fragrant herbs will add a flavour punch to any meal, particularly when they are freshly snipped from your own garden. Get the kids involved in some gardening fun and upcycle tin cans to create your very own herb garden and enjoy fresh herbs at your fingertips!
Prepare
1. Choose a spot outside that is close to your kitchen, or put the cans on a sunny windowsill inside, for easy access.
2. When planting herbs in containers use Tui Pot Power, Tui Herb Mix or even soil from the garden mixed with some fertiliser for nutrients. Tui Pot Power is a lightweight premium mix formulated using superb growing media technology, coupled with superior ingredients. The added benefit of Acadian seaweed stimulates root development and improves overall plant health.
3. Remove the labels from the tin cans - soaking them in warm water will make it easier to remove the labels.
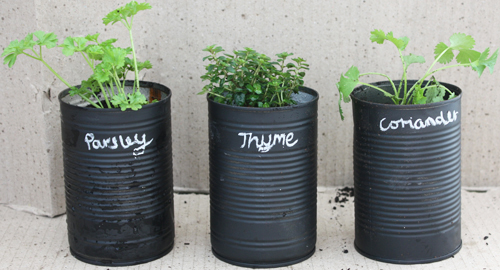
4. Now it’s time to decorate your cans! This part is up to you so get creative - some cool ideas include spray painting the cans rose gold, painting with black chalk paint, white for a modern look or different colours for each can. We chose to spray paint ours with black chalk paint. For more inspiration see our pinterest board here >
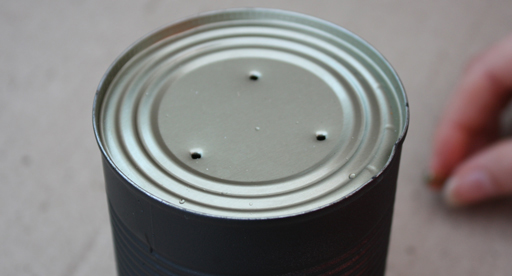
5. As the tin cans have no drainage holes, use a hammer and nail to create three drainage holes at the bottom of each can.
Plant
The best times to plant are early in the morning or late in the day, so the plants aren’t exposed to the hot sun straight away.
For this project we chose to plant coriander, parsley and thyme.
Directions for planting in containers:
6. Partly fill your tin can with Tui Pot Power or Tui Herb Mix. Tap the can gently on the ground to settle the mix.
7. Fill a bucket with water and add two capfuls of Tui Organic Seaweed Plant Tonic. Soak seedlings in the bucket of Tui Organic Seaweed Plant Tonic, ensuring they are fully submerged.
8. Make a hole in the mix for the plant with your finger.
9. Remove the herb plant from its container.
10. Gently loosen the root ball of the plant.
11. Position the plant in the planting hole. Ensure the plant is sitting at the same level in the soil as it was in its seedling container.
12. Fill in with Tui Pot Power or Tui Herb Mix, up to 3cm from the top.
13. Press soil gently around the base of the plant.
14. Water your herbs well.
15. Add finishing touches to your new herb planters - label them using tags, chalk or paint, and add lace, hessian or twine for extra interest.
Nourish
16. Feed your herbs and they will feed you. Plants use nutrients from the soil as they grow, so replenishing the nutrients ensures your plants grow to their full potential. Feed your herbs with Tui NovaTec Premium fertiliser or any other controlled or slow release fertiliser you have on hand. Regular applications of Tui Organic Seaweed Plant Tonic will also keep your herbs healthy.
Herbs aren’t generally affected by pests and diseases, although if your herbs are indoors, lack of sunlight and airflow can reduce plant vigour and attract insect pests like whitefly. To combat, move your herbs outside when you can.
As your herbs are only in small containers keep the soil moist but be careful not to overwater. Put the tins onto a saucer or base to collect the run-off water.
Shopping list
- Tui Pot Power or Tui Herb Mix
- Tui Organic Seaweed Plant Tonic
- 3 x used Wattie's tin cans
- Herb seedlings of your choice (we chose coriander, parsley and thyme)
- Spray paint/paint
- Chalk, hammer, nail
- Your chosen material to decorate the tin can planters with such as twine, hessian or lace.
Post a comment
DIY Herb Project Comments
Be the first to write a comment