5 Steps to Yam Growing Success
- Choose a sunny spot with plenty of space.
- Prepare the soil well with sheep pellets, compost and potato food.
- Water the soil well and leave for a few days before planting. September to December is a good time to plant in New Zealand.
- Mound your yams as shoots grow to protect them and encourage tuber development.
- Keep the soil moist and the area free of weeds.
Follow our full guide below to a bumper crop of homegrown yams.
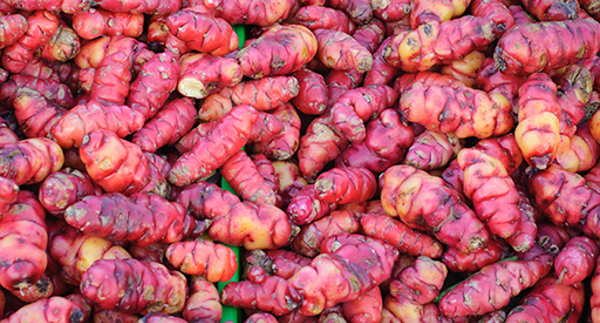
When is a yam not really a yam? Also known as oca, the New Zealand yam is not a true yam as it belongs to a different plant family, but we call them yams anyway! Grown underground like potatoes and kūmara, yams don't require a lot of effort for plenty of reward and are super nutritious with plenty of vitamin A, vitamin B6 and potassium.
Prepare
Yam seed usually appear in garden centres in winter, around the same time as seed potatoes and garlic. If you can't find any yam seed pop down to the supermarket to find some good looking yams and plant these instead.
Get your yams sprouting in later winter, the same time as potatoes, and plant them out when the risk of frost has passed. Put your seed yams in a seed tray or cardboard box in a nice dry place and leave to sprout for a few weeks. The yams are ready to plant when the sprouts are 5cm long.
Plant
Yams need all-day sun and a deep, well-worked soil to develop. Before planting, work some Tui Organic Sheep Pellets, Tui Compost and Tui Potato Food into the soil, water well and leave for a few days before planting. This step is very important as fertiliser can burn the tubers at planting time if it hasn't been worked into the soil well.
- Dig trenches for planting around 15cm deep with 50cm between each trench.
- Plant your yams in the trenches with the shoots facing upwards and cover with soil.
- Water your yams well.
- Continue mounding your yams with Tui Vegetable Mix as shoots grow, until they are approximately 300mm tall. This protects them from wind and frost, prevents light reaching tubers, and encourages tuber development.
Don't worry if the shoots break of when planting as they tend to grow back.
Nourish
Keep the soil moist and the area free of weeds to keep aphids, white butterflies, slugs and snails at bay - they can all be an issue with yams. Add layers of mulch in in summer to keep the soil cool and give you a bigger crop.
One of the secrets to growing yams is watering, they seem to like a lot of water! Always make sure the soils are free draining as yams will rot in waterlogged soils.
Harvesting & Storage
Cold weather before harvest tends to improve the flavour of yams. The tubers don’t swell until right at the end so don’t be in a hurry to harvest! Leave them in the ground once the foliage yellows so that they become nice and plump. It is safe to leave them in the ground after the frosts have burnt the tops and if you're in an area where the soil doesn't become waterlogged over summer, your yams can stay in the ground until you need them.
Store your yams in a dry, dark place in a paper bag, hessian sack or box away from rodent pests. Yams can store well for up to six months in cool conditions.
Yams are a versatile vege and are good steamed, mashed or roasted. They pair perfectly with roasted meats, ginger, orange and butter and can also be sliced up and added to soups or stews!