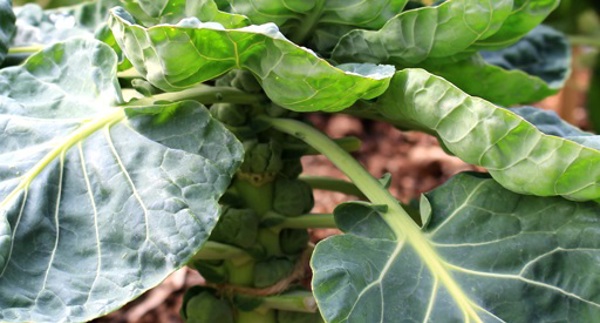
5 Steps to Brussels Sprout Planting Success
- Choose a sunny spot, away from strong winds.
- Prepare your soil with organic matter like sheep pellets and compost.
- Add a layer of vegetable mix to plant into. Brussels Sprouts can be planted in summer and autumn in New Zealand.
- Plant seedlings 50-70cm apart in rows.
- Feed your Brussels Sprouts over the growing season with vegetable food and water regularly.
Follow our full guide below to a bumper crop of homegrown Brussels Sprouts.
Bursting with goodness, these hardy no fuss vegetables are brilliant crops to plant in the winter garden. Adored by many yet loathed by others, Brussels sprouts are one of the easiest and most rewarding vegetables to grow. Bad childhood memories of being forced to eat overcooked Brussels sprouts will be banished once you grow and cook your own!
Prepare
Brussels sprouts are the perfect crop for areas with cold winters, as the lower temperatures generally result in sweeter sprouts. What’s more they produce a bumper yield for the amount of space they take up in the garden. Harvested in the cooler months of the year, they are the perfect staple crop for winter and spring.
Refer to our Planting Calendar for when to plant and harvest in your region.
Plant
Like building a house a good foundation is the key to success in your garden. The better the soil, the better your plants will grow. If you are starting with an existing garden bed dig in organic matter like Tui Sheep Pellets and Tui Compost to your soil. Then you can add a layer of Tui Vegetable Mix. If planting in pots and containers, fill with Tui Vegetable Mix.
The best times to plant are early in the morning or late in the day, so the plants aren’t exposed to the hot sun straight away. Always water plants well before and after planting.
Find a full sun, sheltered position to plant and space at least 50cm-70cm apart, to ensure the crops can fully mature and are not fighting for space, fertiliser and water. If you planted Brussels sprouts or a certain variety of brassica last year don’t grow them in the same spot as pests and diseases can be lingering in the soil, read our Crop Rotation Guide here.
Planting in garden beds
- Water plants thoroughly before planting and allow to drain.
- Dig a hole, approximately twice the depth and width of the root ball of your plant.
- Partly fill the hole with Tui Vegetable Mix.
- Gently loosen the root ball of your plant and position the plant in the centre of the hole.
- Fill in with Tui Vegetable Mix.
- Press soil gently around the base of the plant.
- Water your plant well.
Planting in pots and containers
- Water plants thoroughly before potting and allow to drain.
- Partly fill your container with Tui Vegetable Mix.
- Gently loosen the root ball of your plant and position the plant in the container.
- Fill your container with Tui Vegetable Mix up to 3cm from the top.
- Tap the container gently on the ground to settle the mix.
- Press soil gently around the base of the plant.
- Water your plant well.
Brussels sprouts get sweeter and tastier with each frost, so don’t fret if there’s a heavy frost! Harvest from the bottom of the trunk first and store in the fridge for a few weeks.
Nourish
Feed your plants and they will feed you. Plants use nutrients from the soil as they grow, so replenishing the nutrients ensures your plants grow to their full potential.
Select a fertiliser specially blended for your crop like Tui Vegetable Food. Feed Brussels sprouts planted in pots and containers with Tui NovaTec Premium fertiliser. Well watered, well nourished veges will have a better chance of keeping insect pests and diseases at bay. While your Brussels sprouts are growing regularly apply a dose of Tui Organic Seaweed Plant Tonic to give them a welcome boost.
For supercharged feeding with quick visible results try Tui Vege & Herb Liquid Superfood.
Protect your plants from the elements with layers of Tui Pea Straw Mulch, to help keep their roots moist and keep your garden weed free.
Be vigilant and stop unwanted insects and diseases from ruining your plants. Slugs and snails can be an issue - lay Tui Quash slug and snail control around young plants.